Powershell is a great, GREAT tool for managing stuff, but to use it as intended you really are going to have to get a good understanding of the pipeline.
I’m not a developer but I know that piping data between processes is a fairly common thing, but as far as I know PowerShell have a very interesting way of using a pipeline.
PowerShell is object oriented
I have worked with a few other shells like CMD and Bash, and they too use the pipeline to transfer data between commands. Bash has a lot of commands to parse the output of a command, and filter out the essence before sending that to the next command. PowerShell have this too, but there is an important difference between PowerShell and Bash.
What is a pipeline?
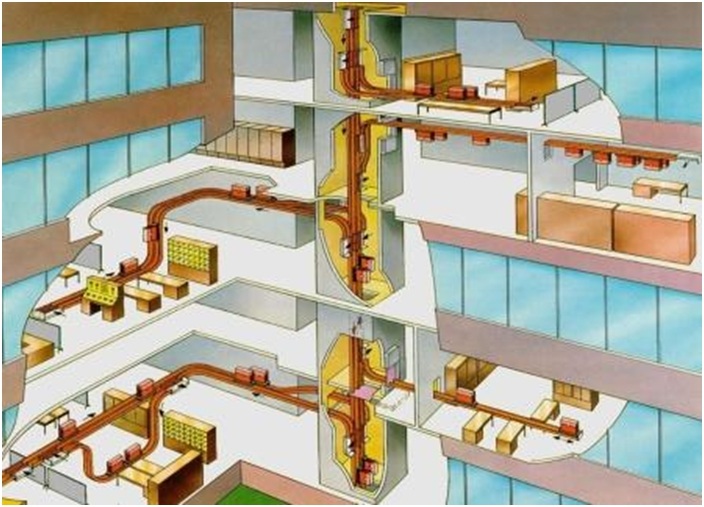
I like the analogy of the pneumatic tube systems of old. A network of tubes or pipes where used to deliver things in plastic containers. A command opens up the containers and processes the contents. Then it puts them back into the tube and passes them to the next station/Command.
Every command has a standard output, usually it is the screen. We might express that to mean that the end of the pipeline is usually the screen. Unless I specify otherwise. So if I type a command the result is sent though the pipeline and if I have not specified what that pipeline connects to, then it connects to screen and outputs the result as text.
Bash outputs text to the pipeline, PowerShell outputs objects.
When we type a command in CMD or Bash, we simply take the output of the command and instead of outputting it to the screen, we send it as input to the next command. That output is going to contain a lot of text that we have no use for. So we use different tools, IE other commands, as an intermediary to remove the stuff we don’t want before sending it as input to the next command. If that input can be used by the receiving command then the process continues. Here is an example of a bash pipeline.
cat sample | grep -v a | sort - r
In this example we read the file “sample” and send it to the command grep. Grep will remove text we don’t want in the pipeline. The next command in the chain will sort the remaining text and as there is no further commands in the chain the pipeline will end and output it’s contents as text on the screen.
In PowerShell, that output is going to be .NET objects, and that means that the filtering is going to be very different from what other shells offer. We have two fundamental things we need to understand and master to make great use of the PowerShell pipeline:
- Removing Objects from the pipeline
- Removing properties from objects in the pipeline
Removing objects from the pipeline
We don’t want a cmdlet to have to process unnecessary objects, so we want to keep the number of objects in the pipeline as small as possible. There are two ways to achive this.
We can use filtering in the first cmdlet in the chain to limit the number of objects that are placed in the pipeline. The example below limits the objects returned to only include objects from the Finance OU.
Get-ADUser -Filter {department -eq "Development"}
We can use the cmdlet Where-Object as the second cmdlet in the chain to remove objects that doesn’t match our condition.
Get-ADUser -Filter * | Where-Object -Property Department -like “Development”
The rule here is that we should filter out unwanted/unneeded objects as far to the left in the chain of cmdlets as possible. The first example will filter out things before placing a single object in the pipeline, which is what we prefer but it is not always possible. The second example potentially places thousands of objects in the pipeline, and then removes the unwanted ones. This is regrettable but sometimes the only way.
Removing properties from the objects
Some objects will have hundreds of properties and require a lot of memory when processing them. The cmdlet Select-Object is a great “Swiss army knife” and allows us to do all kinds of magic to an object.
One of the things we might do often is to remove unneeded properties by specifying the ones we want to keep.
Try the following commands at a computer by starting powershell and typing:
Get-Process
Get-Process | Select-Object -Property Name,CPU
Get-Process | Select-Object -unique
Get-Process | Select-Object -Property Name,Description,Path -Unique
You might get the impression that the Select-Object cmdlet only filters what you seen on the screen but in reality it has removed all the other properties from the objects in the pipeline and since the pipeline ends, the output is displayed on the screen.
Try this:
Get-Process | Get-Member
Get-Process | Select-Object -Property Path, Description | Get-Member
Get-Member will dissect the objects in the pipeline to show you what they contain. You will see things like Properties, NoteProperties and Methods. Note that the second line shows that the Select-Object cleans out anything we didn’t specify for it to keep.
So, that is just a quick lesson on how the PowerShell pipeline works. There are other things you will need to learn. Top of mind is how to create your own properties.
One example is a classic:
The Get-Process cmdlet can list the processes from other computers. For this it requires us to specify a property called “Computername”.
Get-Process -ComputerName 'TestComputer'
The Get-ADComputer cmdlet will get you a list of computers from Windows Active Directory. We will see the name of the computers returned in the property ‘Name’.
In a perfect world we could connect the two commands like this:
Get-ADComputer -filter * | Get-Process
This would give us a (very long) list of all computers and all of their processes. In reality there is a mismatch in property names. When we pipeline objects to Get-Process it will expect those objects to have a property called ‘ComputerName’ but in the example above no such property exists in the objects. The property we want it to use is the property ‘Name’. A square peg in a round hole. This can be fixed using something called “calculated properties”.
Keep learning
Now open up powershell and read about the pipeline in Powershell by typing:
Get-Help about_pipelines


Lämna en kommentar